6 maneras sencillas de fortalecer las caderas todos los días
Stay strong on your feet and help prevent fractures with these do-anywhere exercises for stronger hips.
Think about your hips. Are you picturing bones or muscles? If you're like most people, the bones come to mind first.
That’s not a bad thing—after all, we don’t want to break them! But having healthy, stronger hips is about much more than bone strength. Your hips are made up of dozens of muscles, ranging from the gluteus muscles in the buttocks, erector spinae muscles in the low back, and even your diaphragm and pelvic floor muscles, says Ioonna Félix, D.P.T., a physical therapist and member of the Hip Preservation Center at the Hospital for Special Surgery in New York City.
Together, these muscles support your hips to keep you strong on your feet and help prevent falls, which are the leading cause of hip fractures in older adults. Think of your muscles as scaffolding for your hipbones.
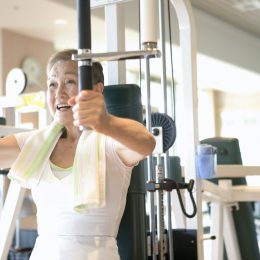
To help you keep that scaffolding strong and stable, we talked to Félix and Michael Silverman, P.T., director of rehabilitation and wellness at Northern Westchester Hospital in New York, about the best hip strengtheners around. All of the exercises below can be done anywhere-the gym, at home, or even a hotel room-and many of them pull double duty by also helping preserve bone density.
Check your eligibility for free access to gyms and fitness classes through SilverSneakers here.
“The key is to make these exercises a regular part of your routine,” Félix says. “For example, try performing them after meals or to break up sitting time throughout the day.”
Work up to three sets of 10 to 15 reps for each. You don't need to do them all at once to get results. Simply aim to complete all six exercises at some point throughout the course of every week.
1. Standing Hip Extension
Stand tall facing a wall, kitchen counter, or back of a sturdy chair, holding onto it for balance. Manteniendo la espalda recta, tense su abdomen y permita que ambas piernas se doblen ligeramente.
Desde aquí, levante una pierna detrás de usted lo más que pueda cómodamente, asegurándose de no doblar más la rodilla mientras lo hace. Haga una pausa, luego baje lentamente la pierna para volver a la posición inicial. That's one rep. Complete all reps, and then repeat with your opposite leg.
Make it harder: Perform the extensions with a small resistance band looped around your legs, just above your knees.
2. Standing Hip Abduction
Stand tall facing a wall, kitchen counter, or back of a sturdy chair, holding onto it for balance. Manteniendo la espalda recta, tense su abdomen y permita que ambas piernas se doblen ligeramente.
From here, lift one leg straight out to your side as far as you comfortably can, making sure not to tilt your trunk as you do so. Haga una pausa, luego baje lentamente la pierna para volver a la posición inicial. That's one rep. Complete all reps, and then repeat with your opposite leg.
Make it harder: Perform the abductions with a small resistance band looped around your legs, just above your knees.
3. March in Place
Stand tall facing a wall, kitchen counter, or back of a sturdy chair, holding onto it for balance if needed.
From here, raise one knee as high as you comfortably can, making sure not to tilt your trunk as you do so. Haga una pausa, luego baje lentamente la pierna para volver a la posición inicial. Repeat with your opposite leg. Esa es una repetición.
Make it harder: March in place while holding a light medicine ball or similarly weighted object against your chest.
4. Bodyweight Squat
Stand tall with your back facing a sturdy chair, feet hip-width apart and arms straight out in front of you for balance.
From here, push your hips back and bend your knees to lower onto the chair, keeping your chest up as you do so. Pause, then push through your heels to return to starting position. Esa es una repetición.
Make it easier: Start the squat from a seated position. Watch a video and get more tips here.
Suscríbase a nuestro boletín informativo
Es rápido y fácil: Usted podría estar entre las 13 millones de personas elegibles.
¿Ya es miembro? Haga clic para descubrir nuestros más de 15,000 centros participantes.
Síganos
Make it harder: Don’t relax onto the chair with each rep. Raise out of the squat as soon as your hips touch the seat. You can also try using a shorter chair.
5. Glute Bridge
Lie on your back with your knees bent, feet flat on the floor about hip-width apart, and heels a few inches away from your buttocks. Press your arms into the floor for support, and brace your core.
From here, squeeze your glutes to lift your hips up until your body forms a straight line from your knees to shoulders. Haga una pausa y luego baje lentamente las caderas para volver a la posición inicial. Esa es una repetición.
Make it harder: Perform the bridges with one leg at a time, lifting the opposite foot off of the floor throughout the exercise. Complete all reps on one side, then switch.
6. Concha
Lie on one side with your legs stacked and knees bent at a 45-degree angle.
Desde aquí, manteniendo las caderas firmes y el pie de arriba hacia abajo, levante solo la rodilla de arriba lo más alto que pueda cómodamente. Sus piernas deben imitar la apertura de una concha. Haga una pausa, luego baje lentamente la rodilla para volver a la posición inicial. Esa es una repetición. Complete todas las repeticiones y luego repita del lado opuesto.
Make it harder: Perform the clamshells with a small resistance band looped around your knees.
¡Tome en línea sus clases favoritas de SilverSneakers!
SilverSneakers members can access live fitness classes and wellness workshops through SilverSneakers LIVE. See the latest schedule and RSVP for classes here.
¿No es miembro? If you have a Medicare Plan, it may include SilverSneakers — at no additional cost. Verifique su elegibilidad al instante aquí.